Honey buttermilk bread – a quick and easy recipe, it’s perfect for beginners.
Buttermilk gives this bread an airy velvety texture and honey gives just the slight sweetness – making it a great choice for baking regularly 🙂 This recipe is a healthier version with half whole-wheat flour, and trust me it doesn’t feel dense or heavy at all!
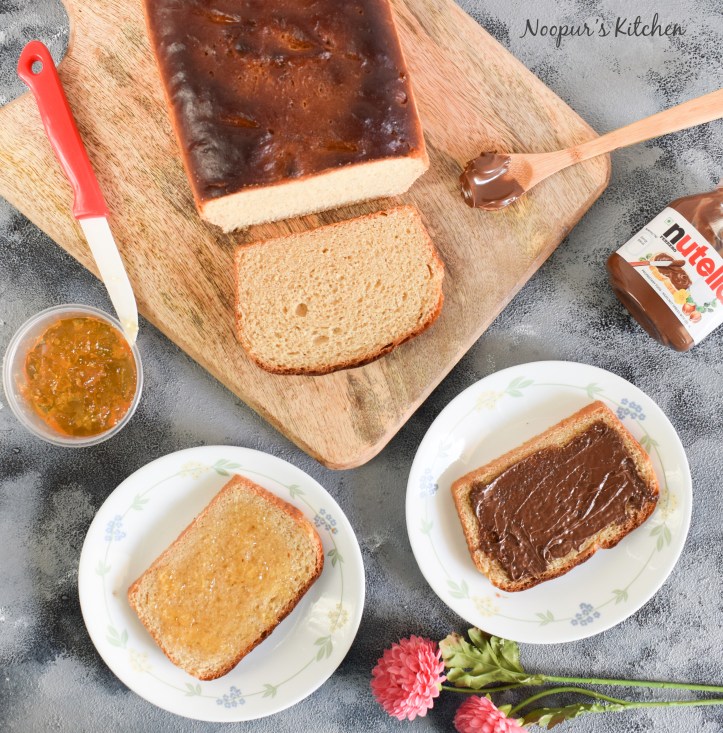
I tried a slice of this Honey Buttermilk Bread with pineapple jam and one with Nutella (of course 😉 ) and loved it!
Join the ‘kitchen scale’ movement and weigh your ingredients – save the weight conversion chart for quick reference.
Ingredients –
200g all-purpose flour (1 ½ cup) (Keep ¼ cup extra aside for later if needed)
200g whole-wheat flour (1 ½ cup + 2 tbsp)
Baking Soda – ½ tsp
Salt – 1 Tsp
Honey – 60g (3 tbsp)
Active Dried Yeast – 1 tsp (half envelope)
Lukewarm water – 50ml (3 tbsp + 1 tsp)
Oil – 2 tbsp
Buttermilk – 200ml (Add 1 tsp of vinegar to 200ml milk and leave aside for 5min to make your own buttermilk)
Butter – 1 tsp for brushing the top
Procedure –
1. Activate the yeast – in a bowl/cup, add lukewarm water, ½ tbsp honey and yeast and set aside for 5 minutes till it gets frothy.
2. Meanwhile, in the stand mixer fitted with dough hook (or a large bowl with a wooden spoon), sift the dry ingredients – both flours, baking soda and salt.
3. Add activated yeast, oil, buttermilk and remaining honey and mix on low speed until the dough comes together. If the dough is sticky, add the ¼ extra cup of flour we had set aside, 1 tbsp at a time till you reach a smooth dough. Increase the speed to medium-high and let it mix for about 8-10 minutes.
4. You’ll know the dough is done when it starts leaving the sides of the bowl in one large lump on the hook and is smooth & elastic. If you poke a finger in the dough, it’ll spring right back up. Turn it out onto a clean surface dusted with little flour and knead it lightly into a ball shape.
5. Grease the bowl lightly with oil (I use the same stand mixer bowl), place your dough inside and rotate it slightly to cover it with oil from all sides. Cover the bowl with cling wrap or a clean kitchen towel and let the dough rest in a warm dry place till it doubles in volume – this may take anywhere between 45-60 minutes depending on the kitchen temperature. I usually keep the bowl inside a switched-off oven. Refer to my notes at the end on how to check if the dough is proofed.
6. Once doubled in volume, punch it down to remove the air, take it out on a lightly floured surface and roll it into a rough rectangle. Folding it from the short side, form a tight log and place it into a greased loaf pan seam-side down (I used my new US Pan 9″x5″x2.75″ loaf pan here, love it 🙂 ).

7. Cover the loaf pan with cling wrap or kitchen towel and keep it in a warm dry place for the 2nd rise. This may take 40-50 minutes.
8. Preheat the oven to 200C. Bake the bread for about 30 minutes. You can cover the top with foil if it starts to brown too fast (I didn’t and hence the dark top, lesson learnt 🙂 ).
9. Remove from oven, let it rest for 10 minutes inside the pan and gently turn it out. Brush the top with butter and let it cool completely on a wire rack before slicing.
How to check if the dough is proofed –
Gently push your finger into the dough –
a. if it springs back immediately, it’s not proofed yet.
b. if it springs back slowly, it’s done – the gluten strands are strong enough to hold the gas but still allow some expansion.
c. if it doesn’t spring back at all and the indent stays, it’s over-proofed.
Recipe inspired by RestlessChipotle and Sonlicious blogs

Great recipe, thanks for sharing !
Thankyou 🙂 do make it!
hi
hi….